Listed here are 7 Methods To raised Rs485 Cable
페이지 정보

본문
 See the part "Alternate Functions for chosen STM32 MCUs". MODE. Seek advice from the corresponding datasheets of your MCU or discover these settings within the part "Alternate Functions for chosen STM32 MCUs". It ought to solely be chosen when the SERIAL subsystem will not be supported by your MCU. The PIO subsystem is a Raspberry Pi RP2040 specific implementation, rs485 cable utilizing an integrated PIO peripheral and is subsequently only accessible on this MCU. Override the default USART SIO driver if you utilize a USART peripheral that does not belong to the default chosen SIOD1 driver. TX Pin is at all times Alternate Function Push-Pull, RX Pin is all the time regular enter pin for any USART peripheral. Resulting from its inner design Full-duplex is slightly extra environment friendly than the Half-duplex driver, however Full-duplex should be primarily chosen if Half-duplex operation just isn't supported by the controller's USART peripheral. Targeting ARM boards primarily based on ChibiOS where communication is offloaded to an USART hardware machine.
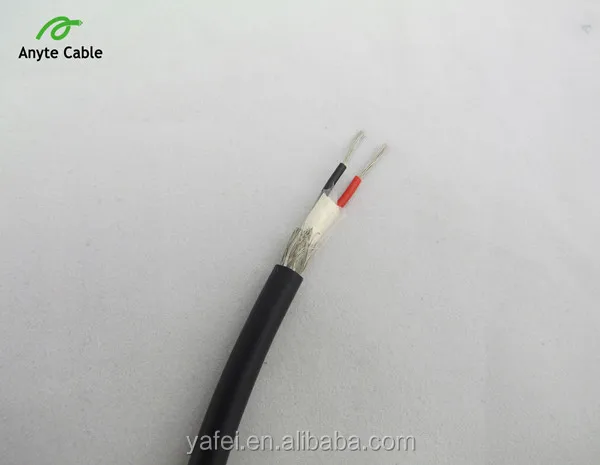
Moreover, working with such a sophisticated device as RS485 communication cable is a wonderful alternative for an engineer to enhance their expertise. Because of this my board is still a totally DHCP compliant gadget without making a DHCP request each time it wakes up, this is what the lease time is for after all. But since I'm making a second revision board to fix these issues anyway I determined to incorporate a battery protection chip this time round. I also forgot to add the thermal relief specified in the layout strategies of the half so whereas charging that chip is practically constantly at 80°C making the worth of the temperature sensor raise by around 5°C. Since this solely impacts the board when the battery is charging it isn't a critical fault. The MOSFET will disconnect the battery power when 5V is equipped and the diode makes sure that the ability of the battery will not ever move back into the 5V part of the schematic. If you are having issues with serial communication, you'll be able to allow debug messages that will give you insights which part of the communication failed. I overlooked all the part numberes for the by means of-gap components since those are either costlier or unimaginable to assemble and in addition fairly simple to solder manually if required on that particular board.
From there it is using the Aisler webpage to repair up the MPN matching with precise components from varied suppliers and pressing order. For that the MPN column is added that accommodates the producer part quantity. This is the part that's added to fix that. For JLCPCB a LCSC column was added to the half information that comprises the part code for ordering from LCSC. For the meeting service metadata has been added to the schematic. The board itself is extremely simple nevertheless it did give me a chance to run via the complete process of going from a schematic to an actual physical product. For implementing this I mostly looked at the nodeMCU v3 schematic as reference and in addition made the essential layout of the PCB similar to that board. For value optimization I skipped battery protection on the board. Another situation on the board is that the battery charger chip gets very popular and is too close to the temperature sensor.
 This receives 5V from the USB connector or the battery power (or both) and feeds them into the regulator to generate the 3.3v rail. It's good for this usecase since the interface is simply pinheaders with a defined pinout and it defines the facility provide as 3.3V which I already have on the board. It's a PCB that only has pinheaders and connectors on it. When that does not scale an alternative choice is putting the modules on a customized PCB. To actually get it made Aisler has a pleasant plugin for the PCB editor in Kicad: Aisler Push. Most of my exterior sensor boards are already temperature/humidity sensors so it is smart to only embody it since it is a cheap chip. That is an open specification made by Digilent to attach modules to their FPGA growth boards. Another optimisation is using a static ip deal with as a substitute of DHCP to save another second. Due to this I only must power down the board when i want to alter the IP handle as an alternative of reflashing it or building in some configuration net interface. I have calculated it to be around 3 months but it would take some time to have conclusive results on that.
- 이전글The Ugly Side of Highstakes 777 26.04.12
- 다음글Stage-By-Stage Ideas To Help You Obtain Web Marketing Accomplishment 26.04.12
댓글목록
등록된 댓글이 없습니다.